

How to make a traditional pho style bone broth:
(Thread)
(Thread)


Pho is one of my all time favorite things to cook
Making a delicious, gelatinous bone broth is one of the healthiest things you can possibly make!
Making a delicious, gelatinous bone broth is one of the healthiest things you can possibly make!
Besides that, the convenience is unmatched. Yes, it takes some time to make the broth. But once it’s done, you can whip up a delicious, healthy meal in minutes.
You can cook some shrimp, slice some raw steak very thin, cook some rice noodles and boom you have a nourishing meal
You can cook some shrimp, slice some raw steak very thin, cook some rice noodles and boom you have a nourishing meal
Combining the gelatinous broth with another type of lean protein is one of the best ways to balance amino acids as well (glycine to methionine ratio) which is crucial!
Let’s get into it:
1. Bones
2. Aromatics/spices
3. Blanching
4. Roasting
5. Toasting spices
6. Simmering
7. Straining
8. Constructing your bowls
1. Bones
2. Aromatics/spices
3. Blanching
4. Roasting
5. Toasting spices
6. Simmering
7. Straining
8. Constructing your bowls
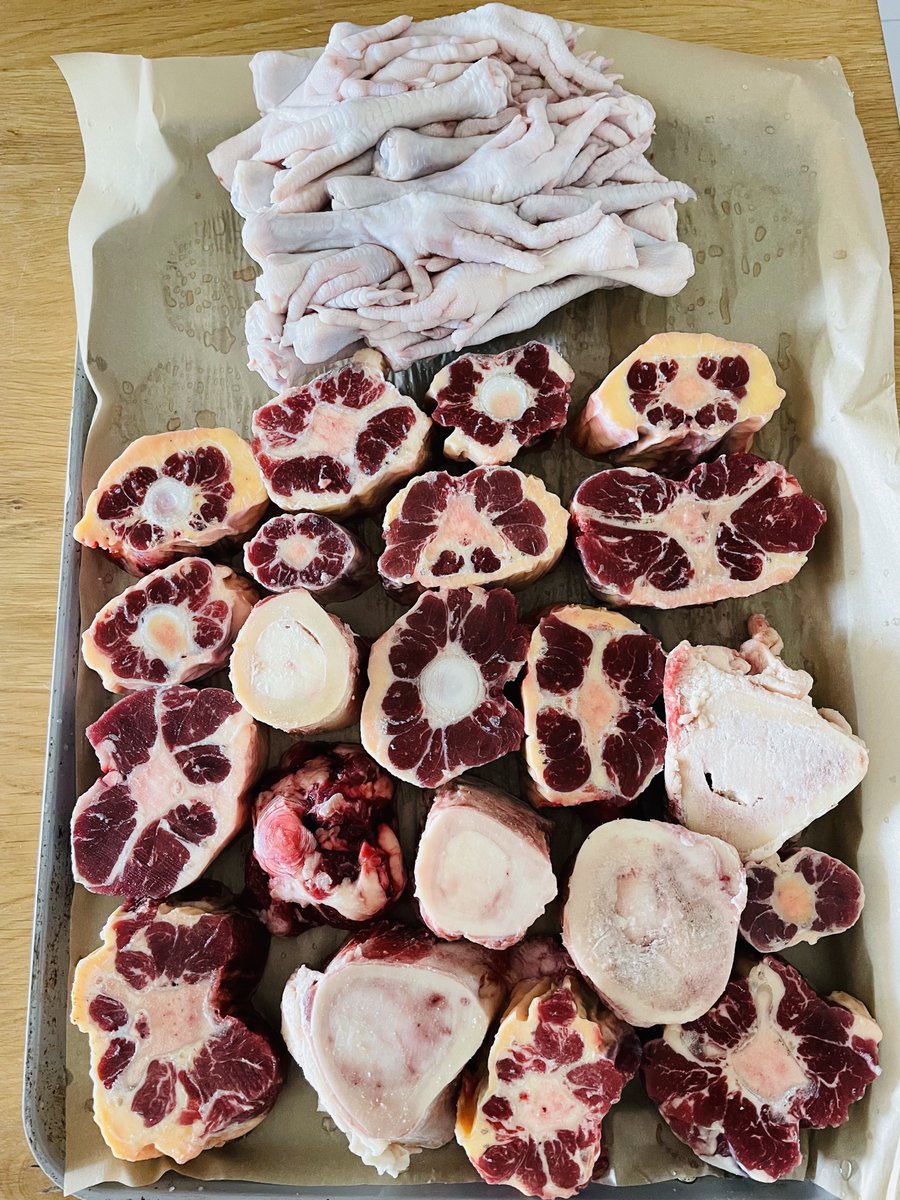
1. Bones
The BEST bones for a gelatin rich broth are:
-Beef knuckle bones
-Beef/chicken feet
-Oxtail
For minerals:
-Marrow bones
-Rib bones/various soup bones
For Flavor:
-Neck bones
-Meaty bones like short rib
My ideal combination is:
3-4 beef knuckle bones
1 lb chicken feet
1 neck bone
This has been a flavorful, extremely gelatin rich combination. I've never been able to find beef feet, but they would be a great addition as well.
You can also add a couple knuckle bones, a meaty bone, and various rib/marrow bones. Any combination works, but if your goal is to get maximum gelatin, including at least some knuckles or feet is a good idea.
It is important to use the best quality bones possible; ideally 100% grass fed, pasture raised beef, and pasture raised chicken.
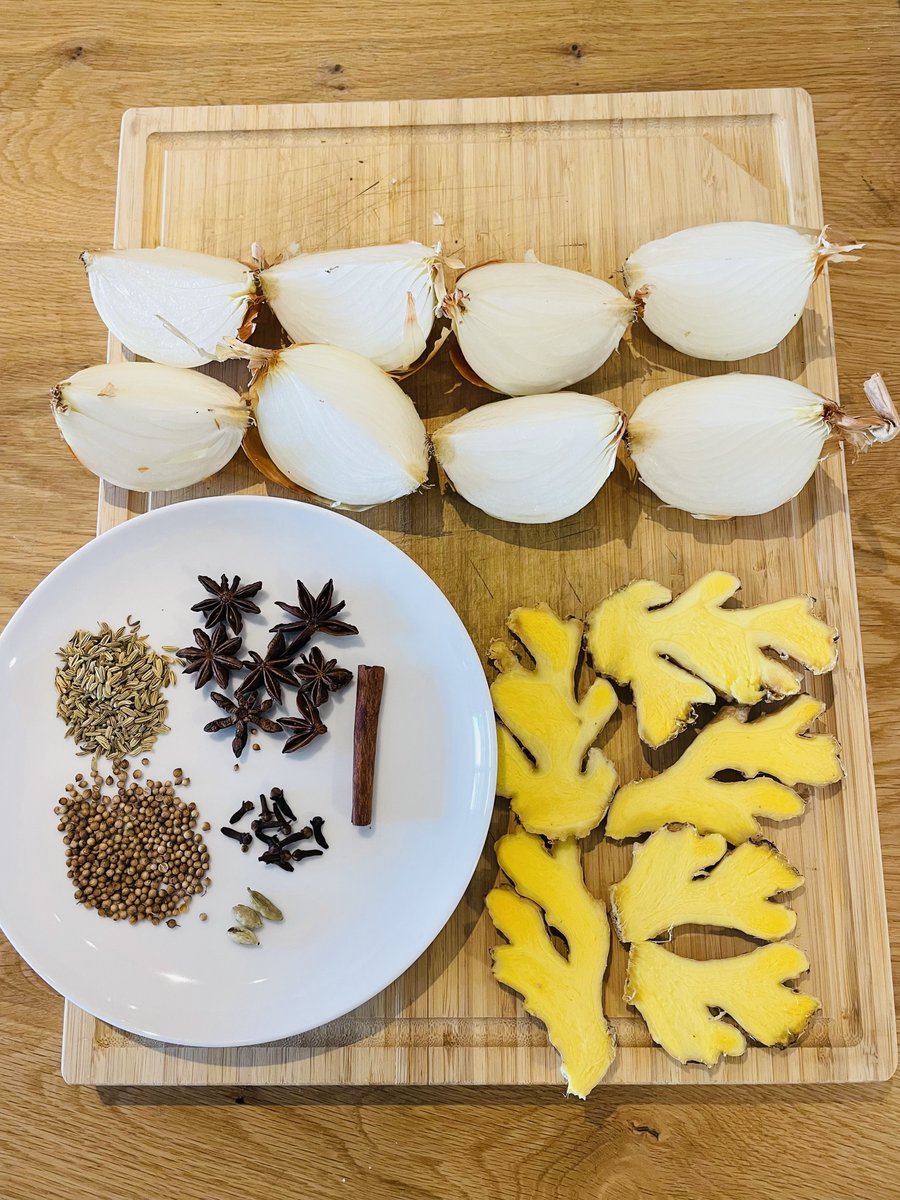
2. Aromatics/Spices
For a pho style broth, we are going to use:
-Yellow onion
-Ginger
-Cinnamon stick
-Coriander seeds
-Fennel seeds
-Cardamom pods
-Whole cloves
-Star anise
If you can’t find these in a local supermarket you can almost always get them on Amazon!
For a pho style broth, we are going to use:
-Yellow onion
-Ginger
-Cinnamon stick
-Coriander seeds
-Fennel seeds
-Cardamom pods
-Whole cloves
-Star anise
If you can’t find these in a local supermarket you can almost always get them on Amazon!

3. Blanching
This is how we clean the bones. Add all of them to a large pot, then cover them with cold water.
Bring to a boil and boil away for about 15 minutes. This will get rid of all the impurities on the bones. Strain and set aside.
This is how we clean the bones. Add all of them to a large pot, then cover them with cold water.
Bring to a boil and boil away for about 15 minutes. This will get rid of all the impurities on the bones. Strain and set aside.
4. Roasting
Roasting is a very important step. This adds a ton of flavor to your broth.
Roast the bones at 450 degrees for about 30 minutes, or until the bones have nice browning on them. The exact time doesn't matter too much, it's really just all about color. I do this on a baking rack so you get color on all sides.
Make sure to remove all the marrow from the bones when they are done roasting. Leaving the marrow in your broth will result in a metallic tasting, cloudy broth. DO NOT throw it out though, marrow has precious nutrients as well. You can eat it straight, spread on a steak or toast, or mix it with butter and herbs to make a nice meaty, buttery, herby spread.

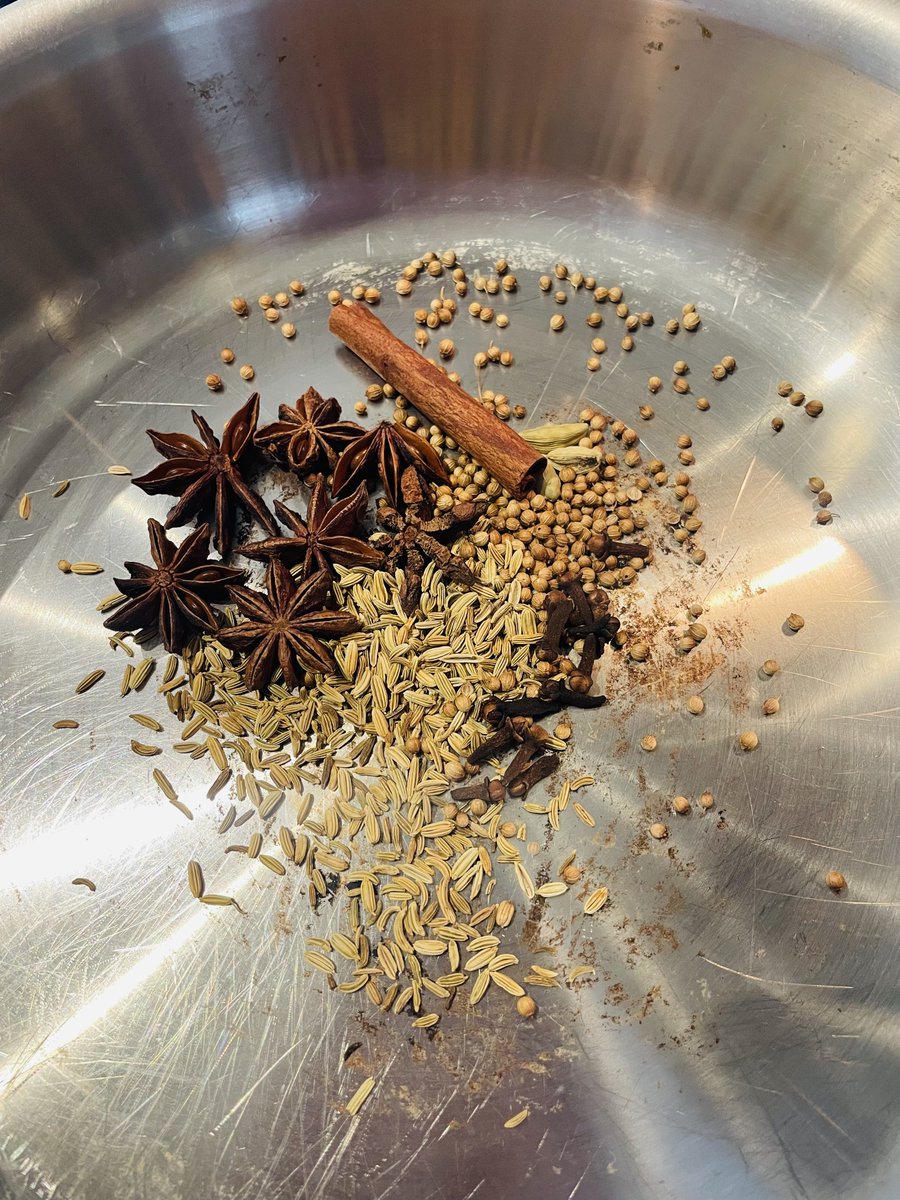
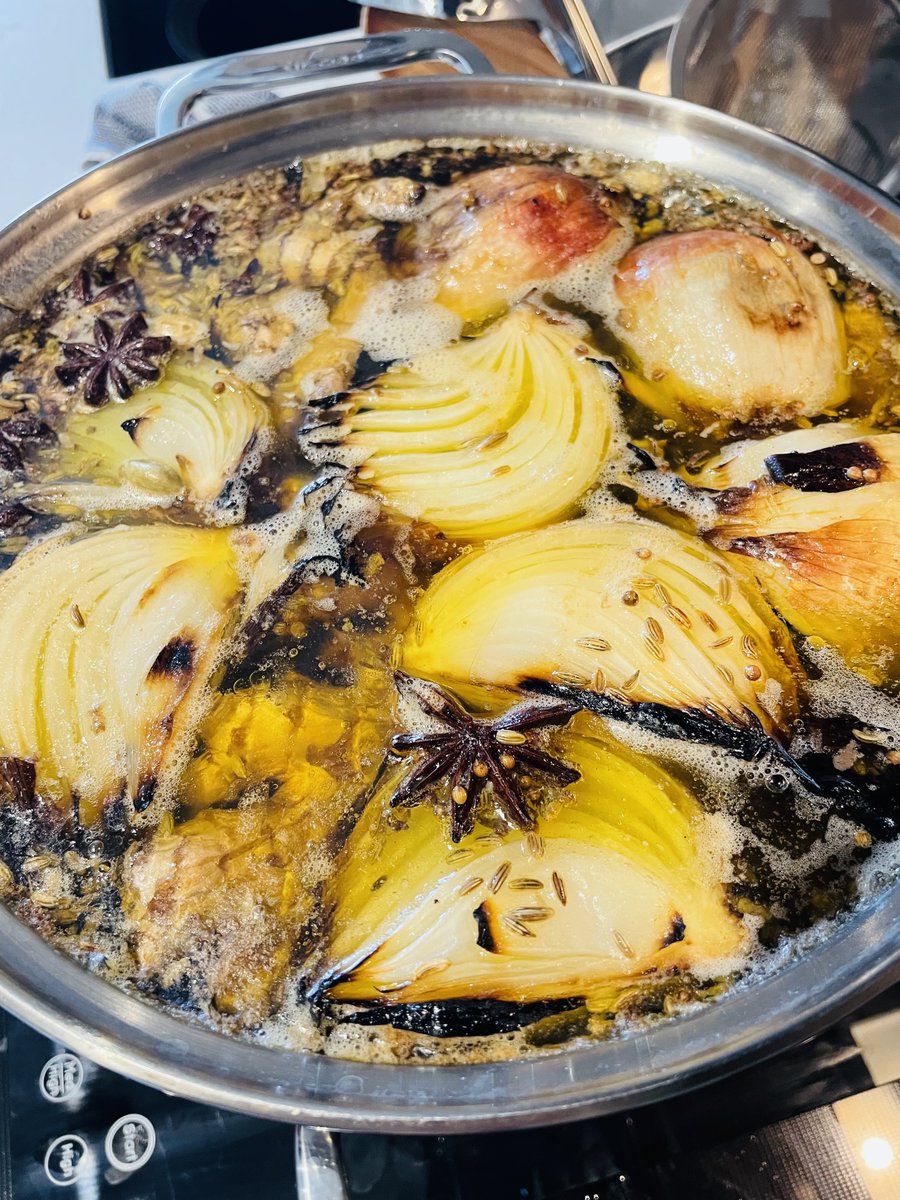
5. Toasting Spices
We want our ginger and onions charred. Slice the ginger long ways in half (showed in picture) and cut the onions into 1/4ths.
On a baking sheet, broil both of them until they are nicely charred.
While that’s going, we can toast our spices. Add the remaining spices to a dry pan over medium heat. Toast for 2-3 minutes, stirring often. Make sure to not burn them! This will help release some flavor.
6. Simmering
The broth should simmer for at least 8 hours, and I recommend simmering it for closer to 24 hours.
Some people prefer to put the aromatics in during the last hour or 2, but I've never had an issue simmering them the whole time.
You really want this to be a bare simmer, and definitely do not let it boil.
A large stock pot is the best option in my opinion, although not everyone is comfortable leaving an open flame overnight. You may just have to sleep next to your broth for a night LOL. I use an electric induction stove top so I can set it at 175 degrees and let it go for 24 hours without having to worry about it boiling over.
As it’s simmering, periodically skim off any impurities that rise to the top.
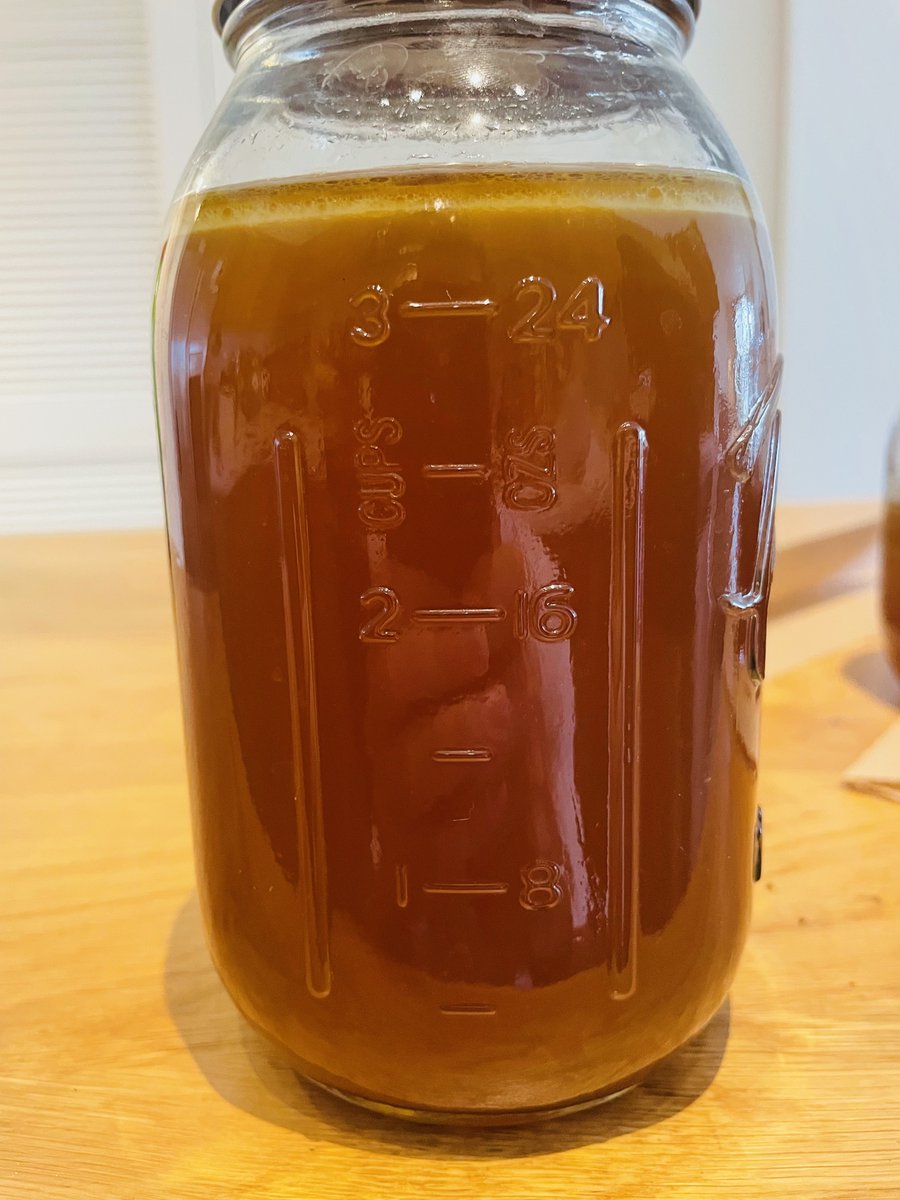
7. Straining
Finally, the moment you've all been waiting for.
I've strained using a number of different ways, from a coffee filter to a cheesecloth. By far the best (and easiest) method has been using an organic hemp nut milk bag. They are cheap, and you can reuse them quite a lot.
Once strained, I like to keep them in individual mason jars (some for fridge, some for freezer) so I can easily pull one out when I want to make a quick meal!

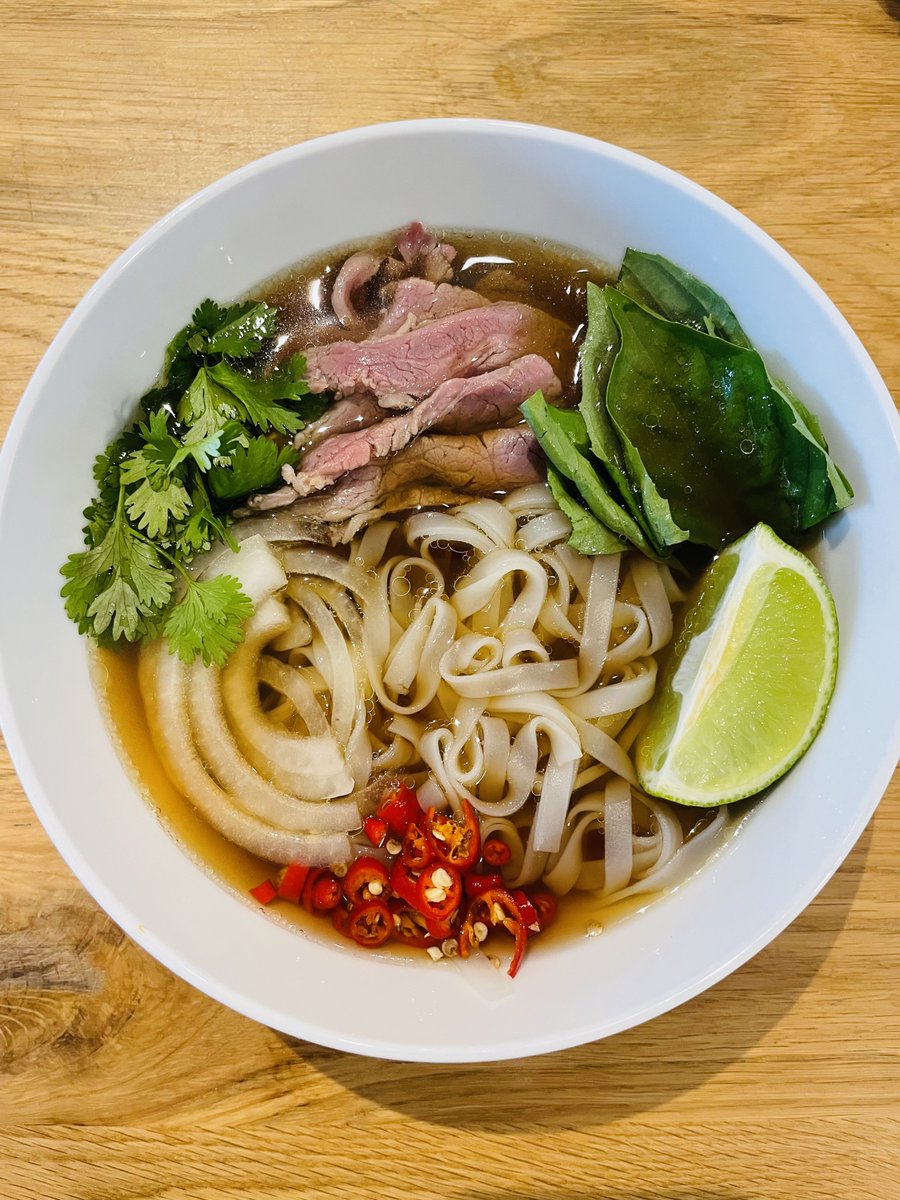
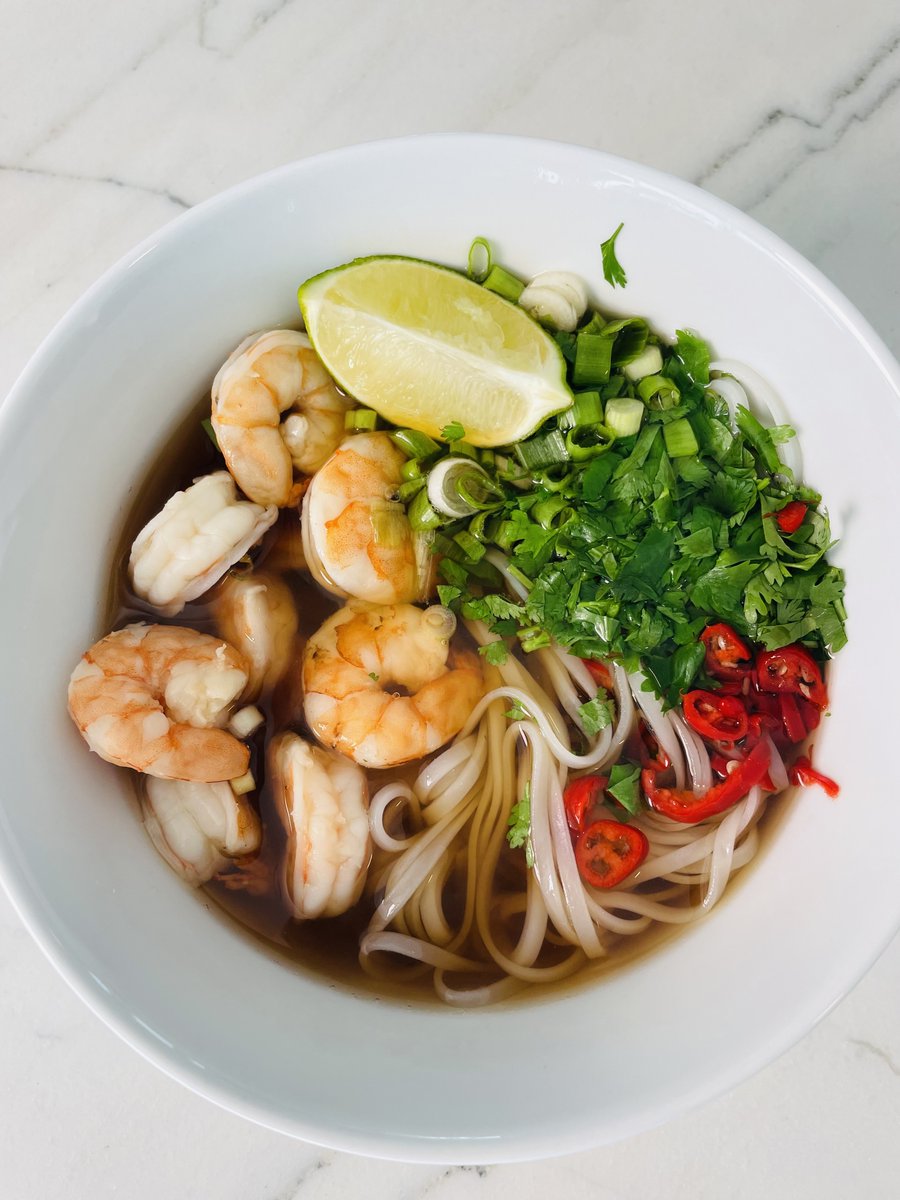
8. Making Your Bowls
You can really do this with any protein, but my 2 favorites are thinly sliced flank steak or shrimp.
If using steak, slice it as thin as possible and add to the bowl raw (the boiling broth will cook it). If using shrimp, cook it in boiling water separately for 2 minutes.
Construct your bowls with protein of choice, cooked rice noodles, white onion, hot peppers, cilantro, basil, bean sprouts and anything else you like! This is totally customizable so make it however you prefer.
Feel free to leave any questions in the comments!
ALL my recipes in one, easy to use app?!🤯
Sign up here: cookingwithchris.co
Sign up here: cookingwithchris.co

Loading suggestions...