

كيف نركب rubber dam
#Dental_by_Hadeel
#Dental_by_Hadeel
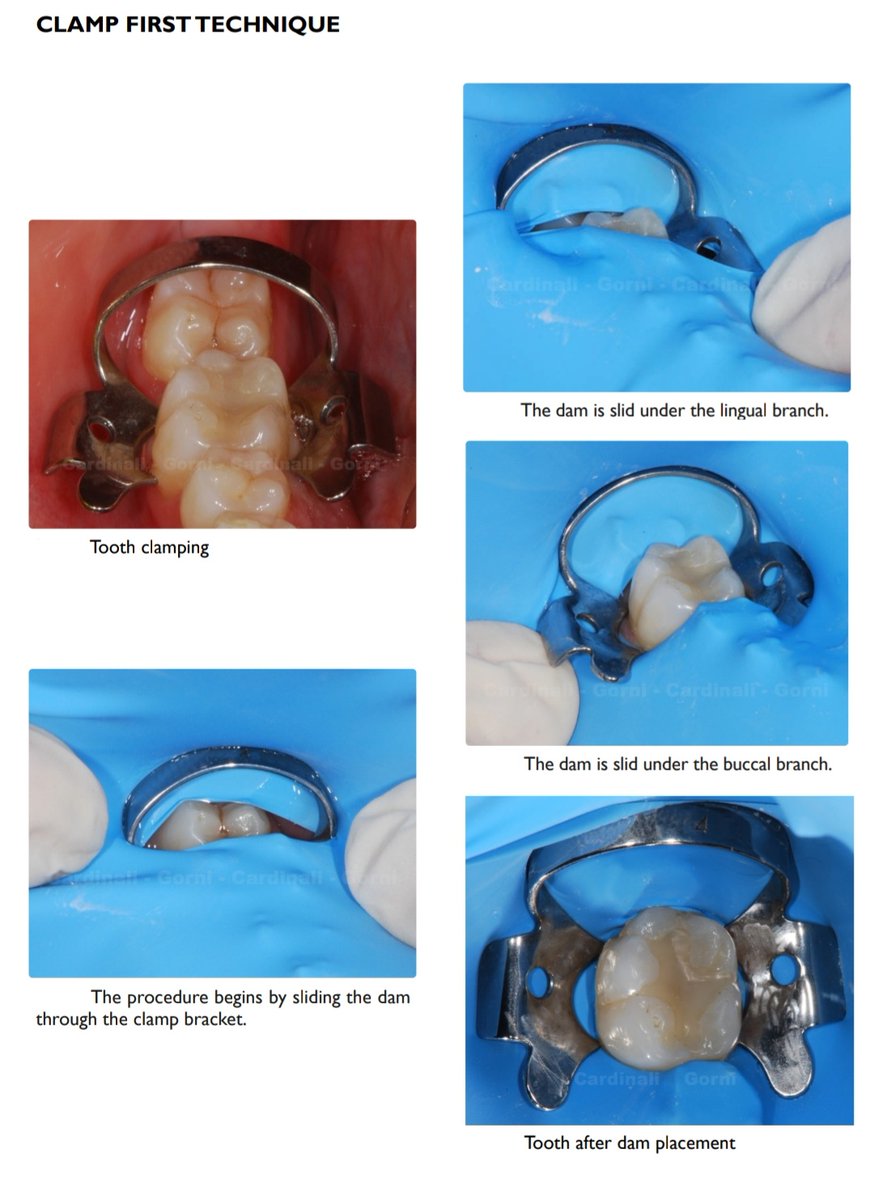
1️⃣CLAMP FIRST TECHNIQUE
🔴TECHNIQUE
The target tooth is first clamped, then
the dam is inserted by stretching the
rubber around the bracket and
subsequently around the branches until
tooth neck is entirely covered.
🔴TECHNIQUE
The target tooth is first clamped, then
the dam is inserted by stretching the
rubber around the bracket and
subsequently around the branches until
tooth neck is entirely covered.
✅ADVANTAGES✅
A two-
handed procedure so it doesn’t need any
assistance. Its biggest benefit is the
excellent operative field visibility during
placement. It can be implemented only
with single-bracket (premolars-molars)
and preferably wingless clamps.
A two-
handed procedure so it doesn’t need any
assistance. Its biggest benefit is the
excellent operative field visibility during
placement. It can be implemented only
with single-bracket (premolars-molars)
and preferably wingless clamps.
❌ DISADVANTAGES❌
Should the clamp unfasten during
placement, the risk of swallowing and/or
inhaling it is surely higher than with
other techniques.
Should the clamp unfasten during
placement, the risk of swallowing and/or
inhaling it is surely higher than with
other techniques.
Furthermore, to avoid
any kind of displacement the practitioner
should choose a stable clamp since it is
meant to undergo a severe strain during
sheet placement.
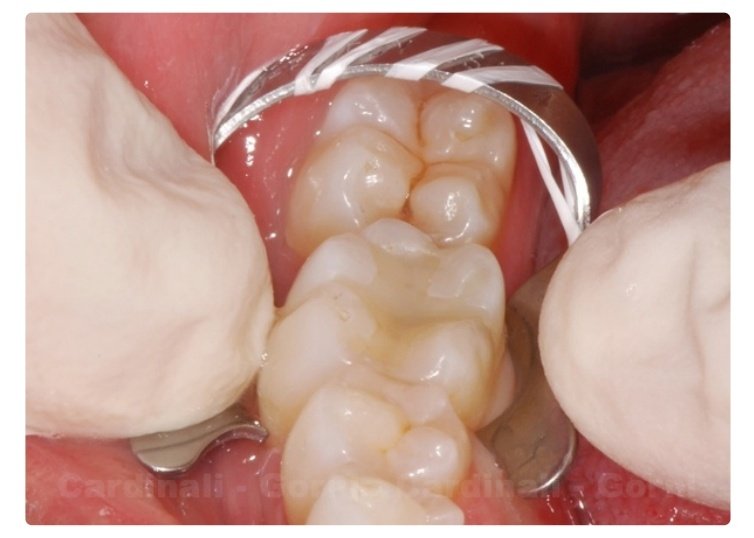
For these reasons the clamp should be fastened with a ligature.
any kind of displacement the practitioner
should choose a stable clamp since it is
meant to undergo a severe strain during
sheet placement.
For these reasons the clamp should be fastened with a ligature.
This technique cannot be implemented
with double-bracket clamps (for anterior
teeth) and the risk of sheet tearing is
higher when using winged clamps since
they are bigger and require a wider hole
stretching compared to wingless clamps.
with double-bracket clamps (for anterior
teeth) and the risk of sheet tearing is
higher when using winged clamps since
they are bigger and require a wider hole
stretching compared to wingless clamps.
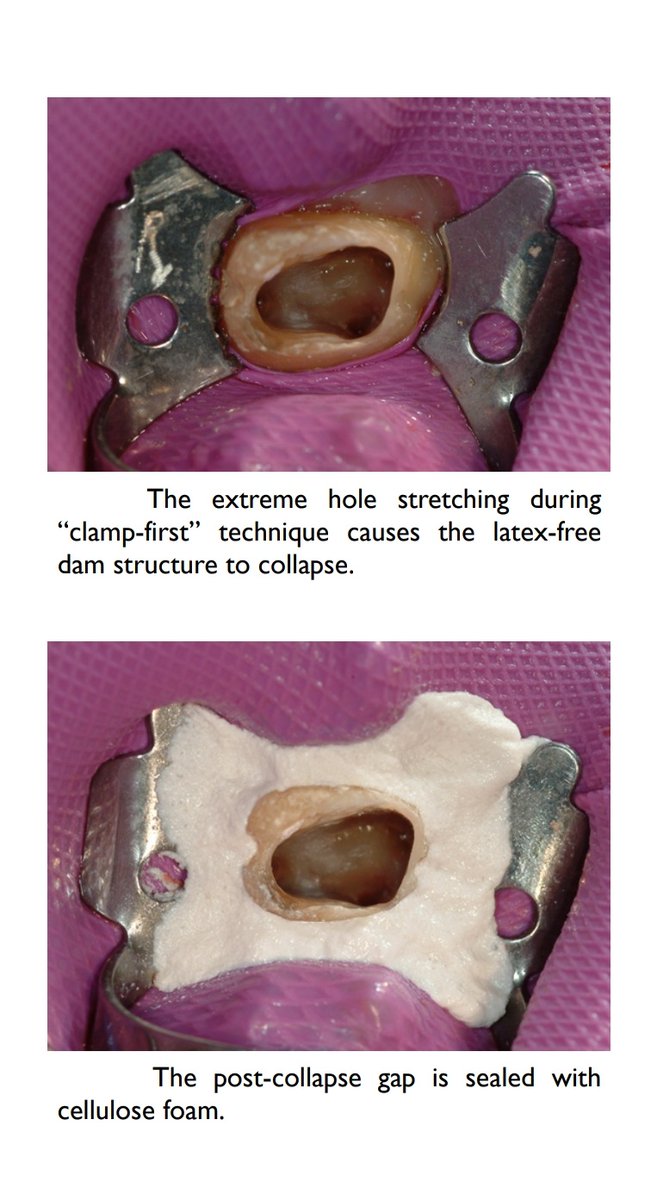
For the same reason this procedure
cannot be implemented with latex-free
dams since the extreme hole stretching
required causes the sheet structure to
inevitably collapse.
cannot be implemented with latex-free
dams since the extreme hole stretching
required causes the sheet structure to
inevitably collapse.
⚠️CLINICAL CONSIDERATIONS⚠️
This technique is very comfortable
because once the clamp stability test is
done and the right clamp has been
chosen, the practitioner can leave it on
the tooth and proceed with rubber
sheet placement.
This technique is very comfortable
because once the clamp stability test is
done and the right clamp has been
chosen, the practitioner can leave it on
the tooth and proceed with rubber
sheet placement.
🔺However, the clamp should never be left
unattended inside the mouth if it is not
secured with a dental floss ligature.🔺
unattended inside the mouth if it is not
secured with a dental floss ligature.🔺
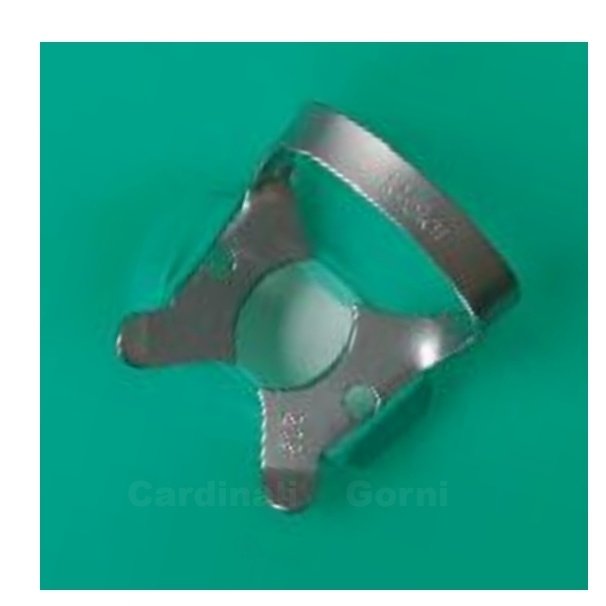
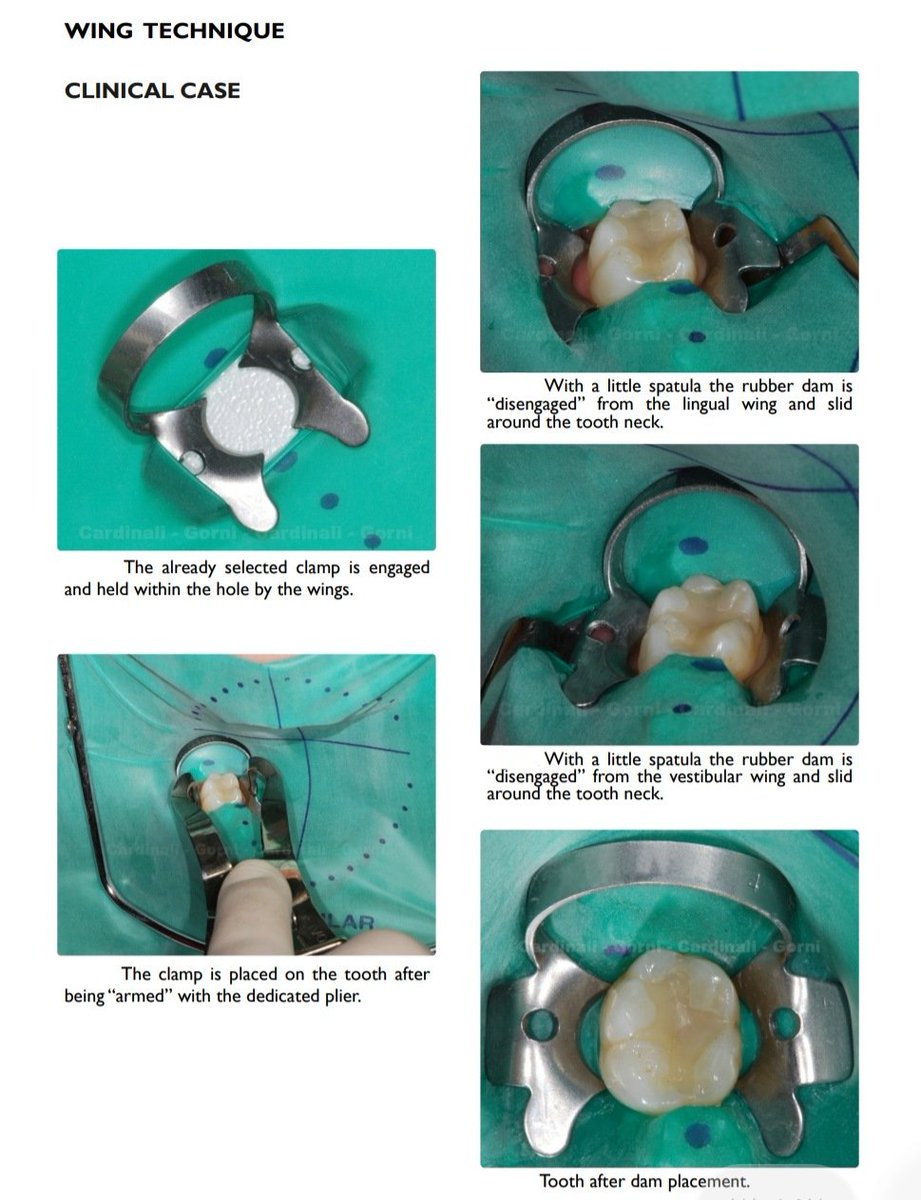
2️⃣WING TECHNIQUE
This very common procedure calls for
the simultaneous placement of clamp
and rubber sheet: it takes its name from
the clamp, which is engaged and held
within the sheet hole by means of the
central wings.
This very common procedure calls for
the simultaneous placement of clamp
and rubber sheet: it takes its name from
the clamp, which is engaged and held
within the sheet hole by means of the
central wings.
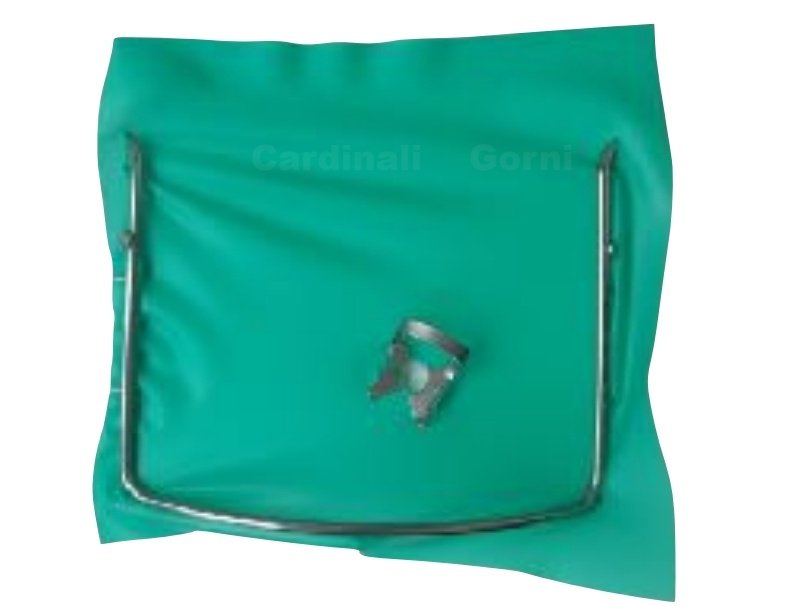
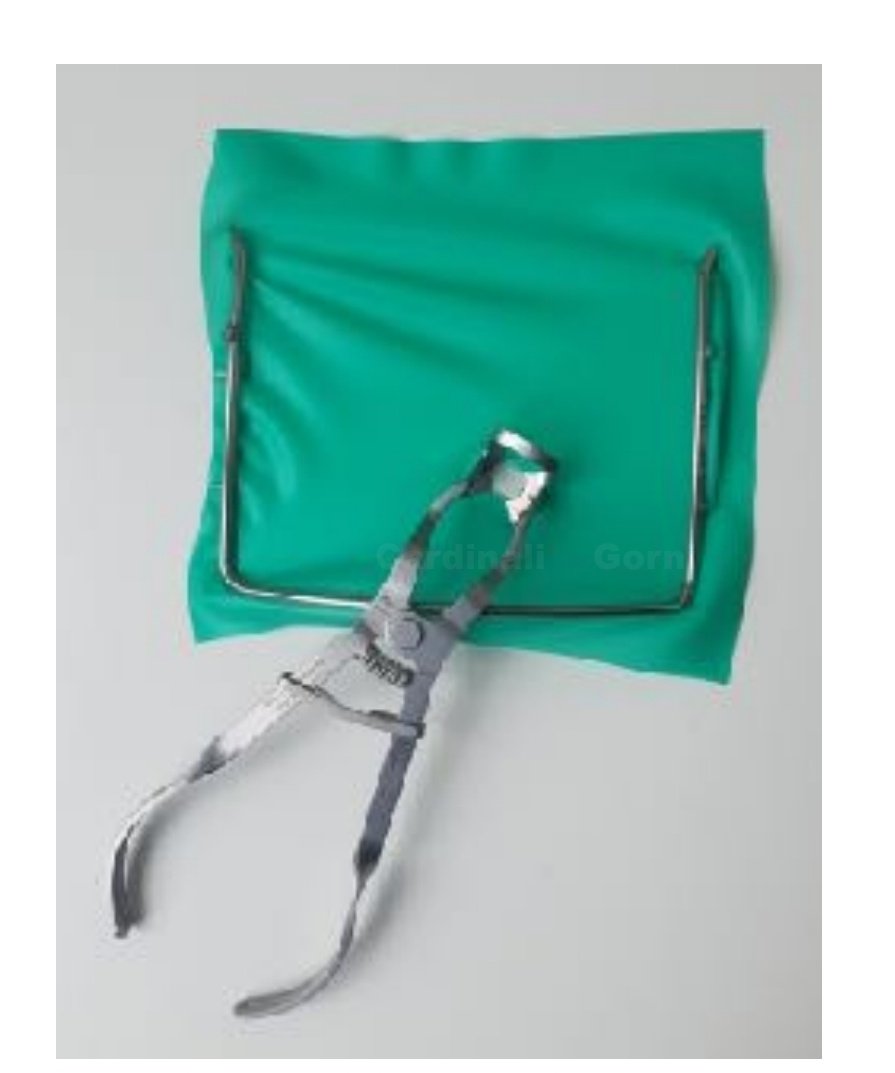
After the sheet has been properly
stretched over the wings by means of
the dedicated plier, the clamp is “armed”
and placement can be performed; the
frame can be mounted simultaneously
with the rubber sheet or later.
stretched over the wings by means of
the dedicated plier, the clamp is “armed”
and placement can be performed; the
frame can be mounted simultaneously
with the rubber sheet or later.
With a little spatula or any other noncutting tool, the rubber dam is slid from
the wings to the tooth neck.
the wings to the tooth neck.
✅ADVANTAGES✅
A two-handed procedure
so it doesn’t need any assistance.
Moreover it is safe because, should the clamp
unfasten from the plier during placement, still it
would be engaged on the rubber sheet hole
without risks of being swallowed and/or inhaled
by the pt.
A two-handed procedure
so it doesn’t need any assistance.
Moreover it is safe because, should the clamp
unfasten from the plier during placement, still it
would be engaged on the rubber sheet hole
without risks of being swallowed and/or inhaled
by the pt.
Dam placement is very quick and
the patient does not feel the oral cavity invaded
by practitioner’s hands.
the patient does not feel the oral cavity invaded
by practitioner’s hands.
❌DISADVANTAGES❌
Using winged clamps is a necessary condition of
this technique. The main issue lies in limited
tooth visibility during clamping.
The practitioner can only see the tooth through
the hole the clamp is engaged to.
Using winged clamps is a necessary condition of
this technique. The main issue lies in limited
tooth visibility during clamping.
The practitioner can only see the tooth through
the hole the clamp is engaged to.
If the tooth is not well recognizable, an
inexperienced practitioner could clamp the
adjacent tooth by mistake.
inexperienced practitioner could clamp the
adjacent tooth by mistake.
⚠️CLINICAL CONSIDERATIONS⚠️
Wing procedure is very quick and minimally
invasive. For this reason it should be considered
the most suitable technique for patients with a
strong emetic reflex or who seem baffled by
dam usage.
Wing procedure is very quick and minimally
invasive. For this reason it should be considered
the most suitable technique for patients with a
strong emetic reflex or who seem baffled by
dam usage.
Limited visibility inherent to this
technique can cause the clamping of the wrong
tooth especially if the target tooth does not
have any distinguishing features.
technique can cause the clamping of the wrong
tooth especially if the target tooth does not
have any distinguishing features.
A tipo solve this
issue is“marking” the tooth by creating with the
turbine a slight cavity to be subsequently
completed after dam placement.
issue is“marking” the tooth by creating with the
turbine a slight cavity to be subsequently
completed after dam placement.
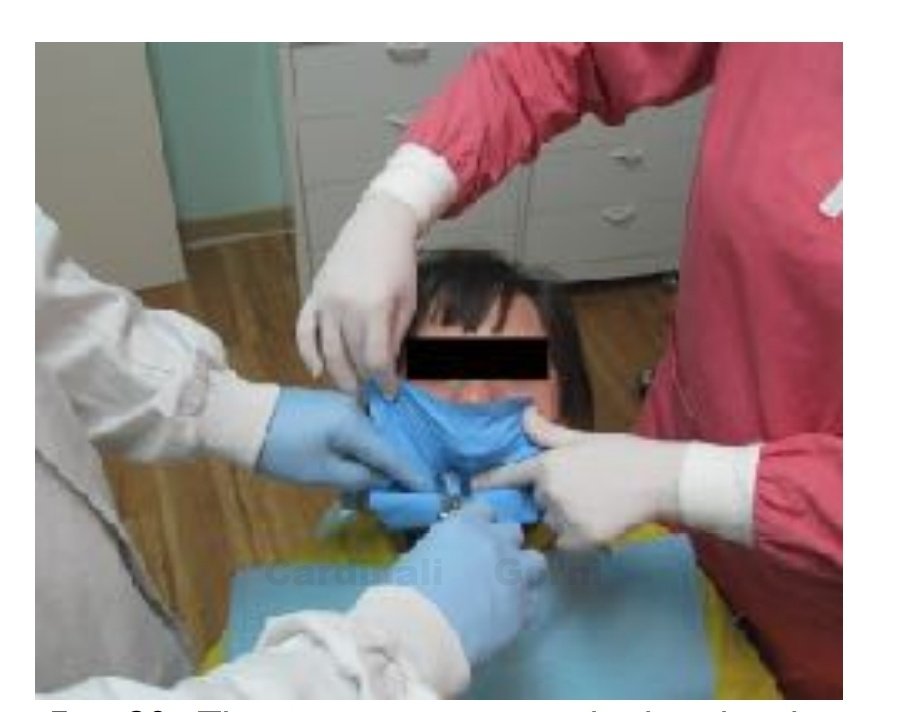
3️⃣RUBBER FIRST TECHNIQUE
This is a four-handed procedure thus the
presence of a second operator is
needed.
This is a four-handed procedure thus the
presence of a second operator is
needed.
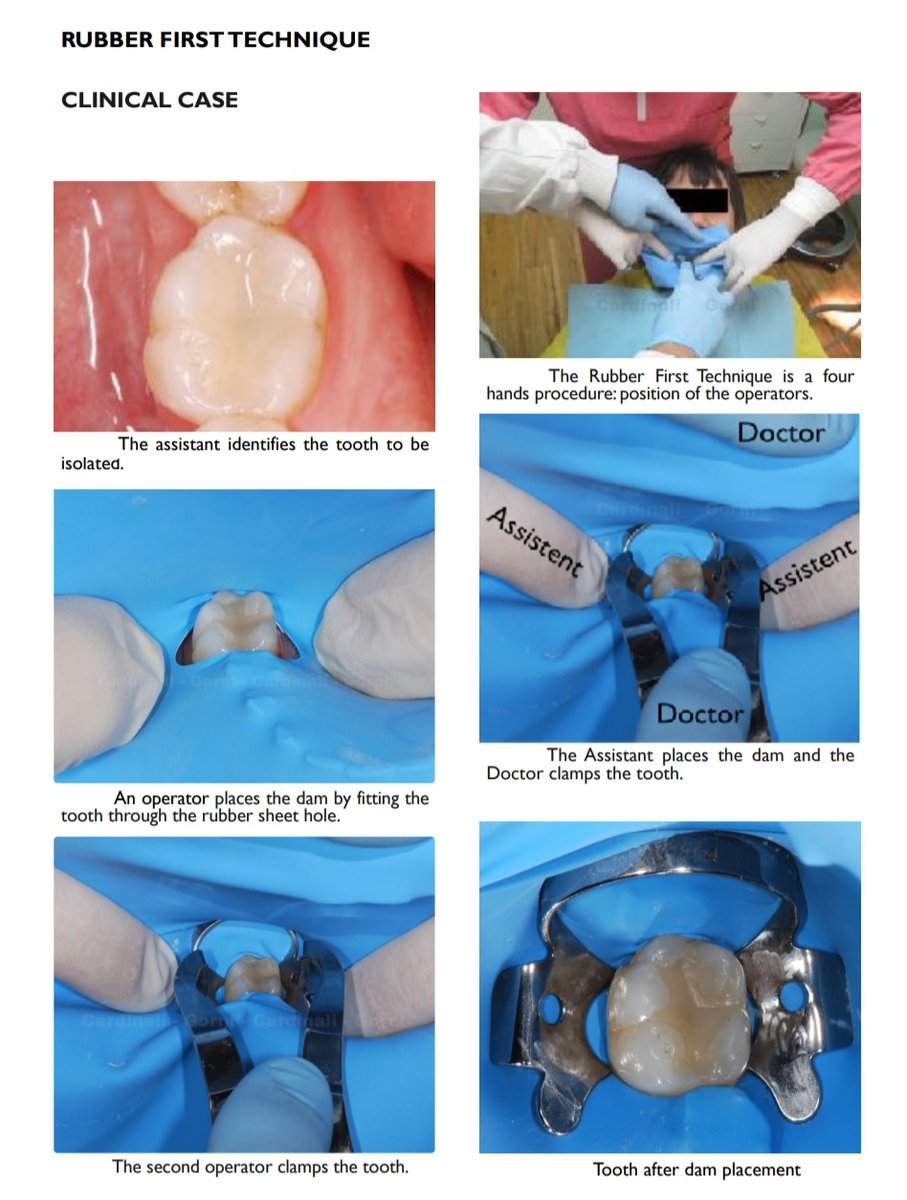
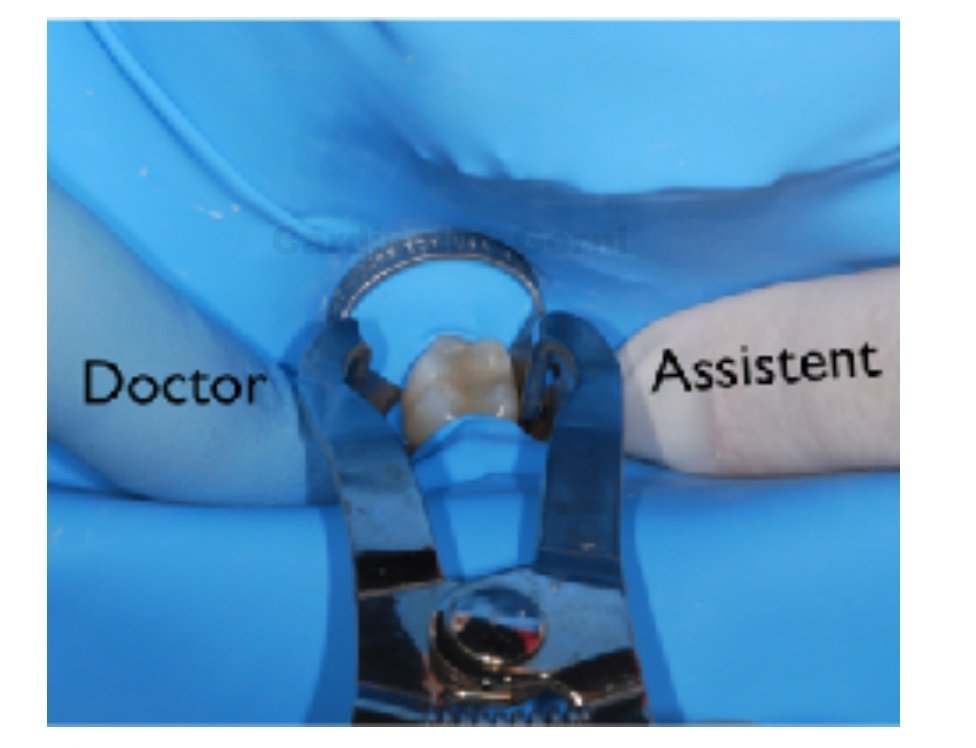
One operator, generally the assistant,
stretches the hole with his/her fingers
and places the dam directly into the oral
cavity by fitting the tooth through the
open gap. Now the dentist can clench
the tooth with the previously “armed”
clamp from the dedicated plier.
stretches the hole with his/her fingers
and places the dam directly into the oral
cavity by fitting the tooth through the
open gap. Now the dentist can clench
the tooth with the previously “armed”
clamp from the dedicated plier.
✅ADVANTAGES✅
The “rubber-first” technique is quick and
safe: if the clamp gets somehow
disengaged from the plier it falls on the
rubber sheet without being swallowed
and/or inhaled by the patient.
The “rubber-first” technique is quick and
safe: if the clamp gets somehow
disengaged from the plier it falls on the
rubber sheet without being swallowed
and/or inhaled by the patient.
Besides being suitable for every type of
clamp, this is the top procedure when
using double-bracket wingless clamps such as the 212 or 90N.
On top of that this is the ultimate technique also with latex-free dams.
clamp, this is the top procedure when
using double-bracket wingless clamps such as the 212 or 90N.
On top of that this is the ultimate technique also with latex-free dams.
❌DISADVANTAGES❌
The first issue is limited visibility of the
target tooth during placement, patient
discomfort due to the invasive action of
the assistant’s hands, who should
maintain the sheet low around the tooth
neck whilst waiting for the dentist to
place the clamp.
The first issue is limited visibility of the
target tooth during placement, patient
discomfort due to the invasive action of
the assistant’s hands, who should
maintain the sheet low around the tooth
neck whilst waiting for the dentist to
place the clamp.
⚠️CLINICAL CONSIDERATIONS⚠️
Identifying the tooth to be fitted into the
hole under conditions of limited visibility
and performing a proper clamping
without damages to surrounding soft
tissues are two crucial steps never to be
committed to the assistant.
Identifying the tooth to be fitted into the
hole under conditions of limited visibility
and performing a proper clamping
without damages to surrounding soft
tissues are two crucial steps never to be
committed to the assistant.
4️⃣BRACKET TECHNIQUE
In this procedure the clamp and the rubber sheet
are simultaneously positioned on the tooth. It
takes its name from the clamp being engaged and
held within the sheet hole by the bracket.
In this procedure the clamp and the rubber sheet
are simultaneously positioned on the tooth. It
takes its name from the clamp being engaged and
held within the sheet hole by the bracket.
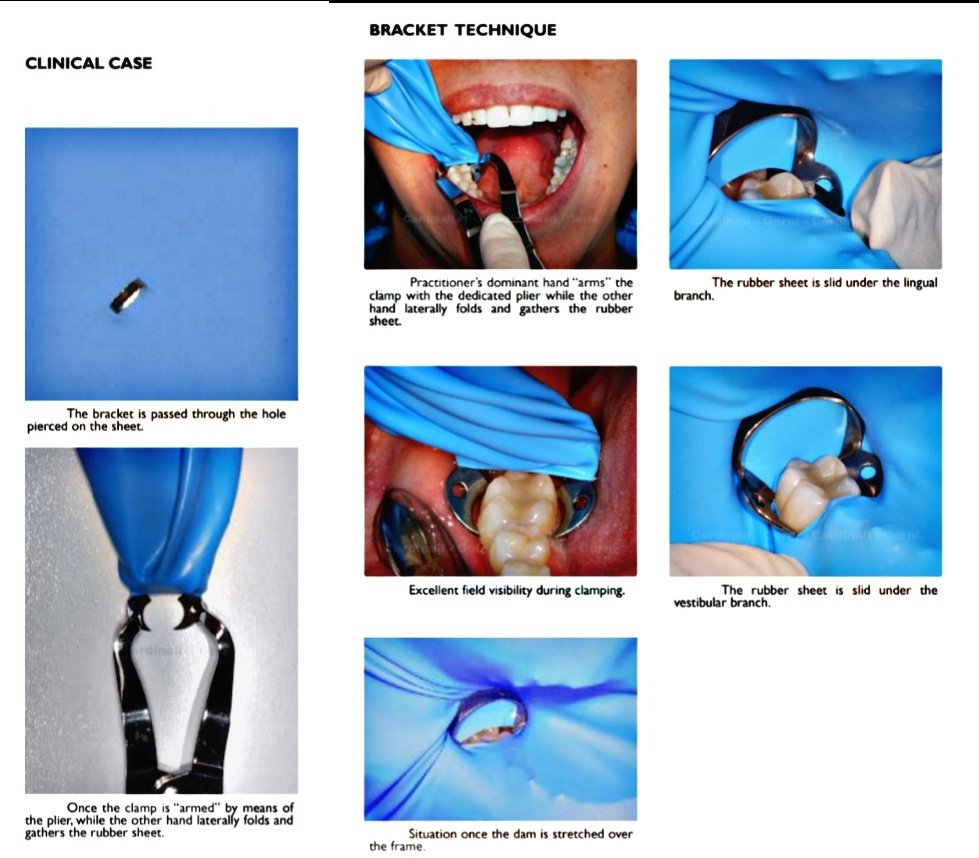
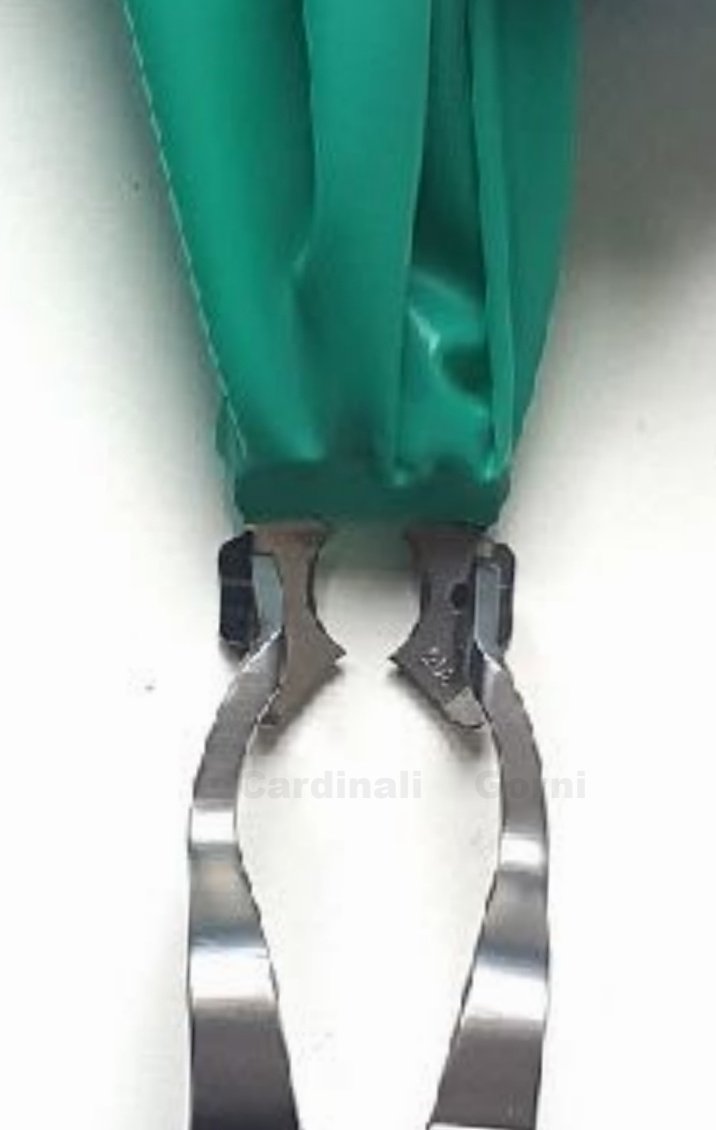
The clamp-dam-plier unit shape reminds of a
person strapped to a parachute (that’s why the
bracket technique is also known as the
“parachute” technique).
When the tooth is clamped, the dam is stretched
over the frame then it is manually slid beneath
both clamp branches.
person strapped to a parachute (that’s why the
bracket technique is also known as the
“parachute” technique).
When the tooth is clamped, the dam is stretched
over the frame then it is manually slid beneath
both clamp branches.
✅ADVANTAGES✅
A two-handed procedure so it
doesn’t need assistance. Moreover it
is a safe technique because,should the
clamp get disengaged from the plier
during placement,still it remains engaged
on the rubber sheet hole without the risk
of being swallowed/inhaled by pt.
A two-handed procedure so it
doesn’t need assistance. Moreover it
is a safe technique because,should the
clamp get disengaged from the plier
during placement,still it remains engaged
on the rubber sheet hole without the risk
of being swallowed/inhaled by pt.
❌DISADVANTAGES❌
Wingless clamps are recommended.
Winged clamps - same design but bigger
– would force to apply a
strong tension on the sheet to make it slide under the wings,therefore
placement would be not so easy and the
risk of tearing the sheet would be higher.
Wingless clamps are recommended.
Winged clamps - same design but bigger
– would force to apply a
strong tension on the sheet to make it slide under the wings,therefore
placement would be not so easy and the
risk of tearing the sheet would be higher.
This procedure can't be implemented
with double-bracket anterior teeth
clamp. We do
not recommend to use this procedure
with latex-free dams because the
excessive twisting of the sheet while
sliding under the branches causes the
sheet structure to collapse.
with double-bracket anterior teeth
clamp. We do
not recommend to use this procedure
with latex-free dams because the
excessive twisting of the sheet while
sliding under the branches causes the
sheet structure to collapse.
⚠️CLINICAL CONSIDERATIONS⚠️
This technique allows the placement of
the sheet and clamp together under
optimal viewing conditions.
This technique allows the placement of
the sheet and clamp together under
optimal viewing conditions.
The bracket technique is also a desired
technique when the clamp must be placed
on the 2ed or 3ed lower molars and
the bracket is clearly pressing the
mucosae covering the mandibular ramus
during clamp testing, or when the clamp
must be placed on the 2ed upper
molars and
technique when the clamp must be placed
on the 2ed or 3ed lower molars and
the bracket is clearly pressing the
mucosae covering the mandibular ramus
during clamp testing, or when the clamp
must be placed on the 2ed upper
molars and
the bracket is clearly pressing
the mucosae covering the zygomatic
process of the upper jaw bone during
clamp testing
the mucosae covering the zygomatic
process of the upper jaw bone during
clamp testing
جاري تحميل الاقتراحات...